it's the much anticipated headband tutorial REPOST :)
Pin It
my latest fab mama jama continues her fabulosity by sharing her technique on how to make your very own sassy headband! she not only is sharing, she photographed and documented each step and emailed me the whole tutorial! christina, you ROCK!
alrighty lovelies, get crafty...and sassy ;)
Supplies:
1.5 inch wide satin ribbon in the
color of your choice
Felt
Hot glue gun
Scissors
Rubber headband in matching color (these also come in different widths – I’d go with the most narrow ones you can find)
Start by twisting the ribbon and rolling it around like a coil, twisting as you go…
(see next pic, too)
Apply a SMALL amount of glue as needed to hold the “coil” together. Remember to continuing twisting the ribbon as you wrap – this creates the bulk.
When your “coil” is as large as you would like it (mine are approximately 1.5 inches in diameter), wrap the ribbon to the back and tack it there with a small dot of hot glue.
Next, begin to loop ribbon as shown in the next couple of pictures, applying small dots of
glue in between each loop to hold them in place.
You don’t need a lot of glue at this point…just enough to keep the
flower from falling apart as you work with it.
Continue around until you have made your way back to where you started. I just happened to
reach the end of the piece of ribbon I had cut in this picture, but it may not work out the same
for you and that’s ok. If you have ribbon left, continue around again, making another layer of
loops (this time a little longer than the others so that they can be seen behind your first layer). Once I reached the end of my ribbon, I began again with a new piece.
Once you have finished making your loops (I use almost the entire roll of ribbon (usually 3 yds on each spool)), you should have a flower that stays together, but as seen here, is not completely glued
throughout. Go back in and add glue under some layers to secure them to the point that the flower can be held as one piece. You won’t be all that gentle with it in the next couple of steps, so you just want to
make sure it doesn’t fall apart in your hands!
Lift the “coil” as well and make sure that it is glued completely to the loops. Make sure that you don’t use too much hot glue…it will squeeze out and won’t be all that attractive on the flower. :/
Next, clip the loops so that they are now two pieces of ribbon on top of each other. Try to cut them in
front of the loop so that the piece that is left in front is shorter than the piece left in the back. You can
always go back and trim ribbon to different lengths, so don’t worry if it doesn’t work out thatway.
Once all the loops have been cut, you can go around the outside edge of the flower, trimming the longer pieces of ribbon so that it is all even and cut to the size you would like the flower to be.
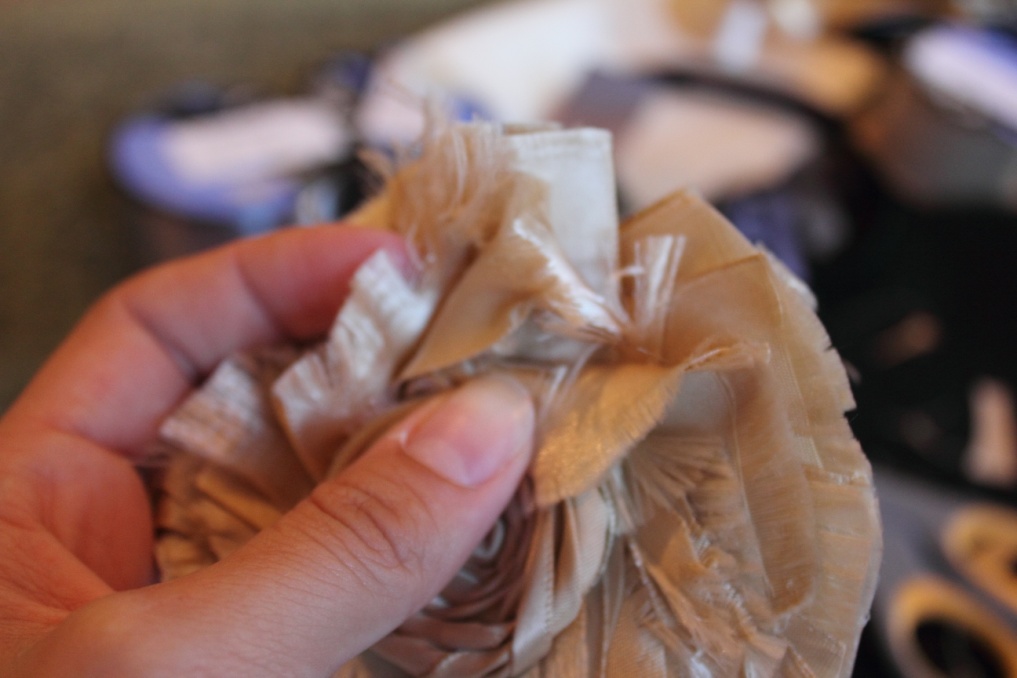
Now begins the fun part…there is really no science to this…but you need those pieces of ribbon to fray! Using my thumb and index finger, I pinch and pull on the ends of each piece, pulling off strings from the edge. Sometimes you get lucky and pull on one that just starts unraveling the ribbon (which I will pull for a bit and then cut it off). Other times, you pull and tug and don’t seem to get anywhere. The point is to continue doing this all around until the flower reaches your desired level of fray‐ness. :)
Though it is hard to see here, when you pull on some of the strings, you may have pieces of ribbon
that seem to knot up…just pull them back apart. I yank and pull…it doesn’t matter if you tear something…you kind of want too! Make sure that you hold the flower in the center with one hand as you pull (this is where it is important that the layers are glued together well too).
When you feel like you have reached the look you are going for, go back and trim off any crazy,
out of place strings, etc. and finally glue down any other areas that need it.
Next, put a line of glue on the back of the flower and attach the rubber headband. Make sure that you put it on the right side (most of these headbands have what appears to be a thin line of hot glue on the inside of them to keep them from slipping off of your head).
Finally, cut out a circle of felt and glue it over the band. Lift up both sides of the band to ensure that it
is glued down completely and won’t life the felt off when you put the headband on.
Double check that everything is glued together and that there aren’t any other places that need
trimming…if not, you’re done!
christina's sweet madi
the firefly behind the fancy ;)
keeping my crazy hair intact :)
if you don't have the steady hands, or the time, OR you just don't feel like making one but really would love to have one...contact christina at fireflyfancy@gmail.com


